

AUDIO & P.A. SYSTEM
Backline: Mic stands & instruments behind the black curtain.
Mics, DIs, cables, adapters: In the black AV cabinet next to the console.
POWER UP
- Flip power switch (lower right rear of console).
- Power on both main speakers (switches on back).
ADDING SOURCES
Use the stageboxes beside the right speaker & behind curtain. Each input maps to the same channel on the console (e.g. input 1 = channel 1).
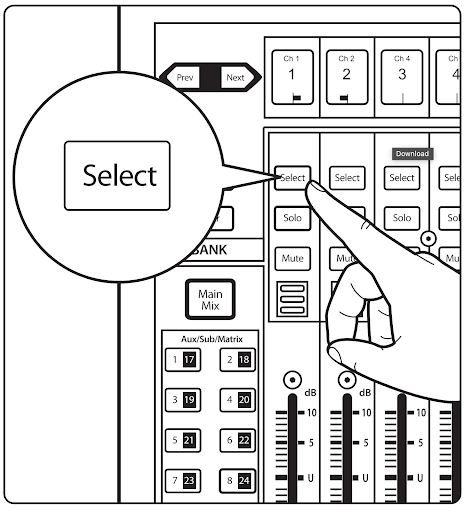
- Press Select on the desired channel.
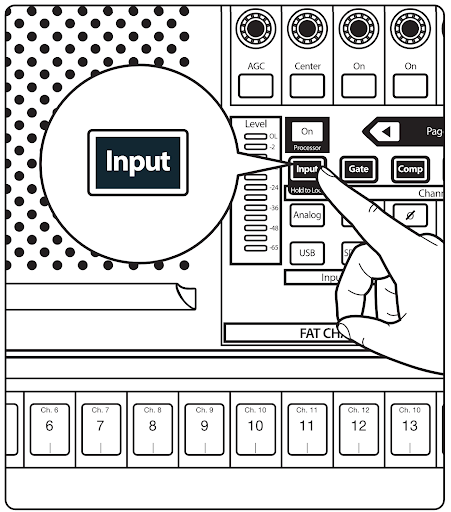
- Press the Input button in the center section.
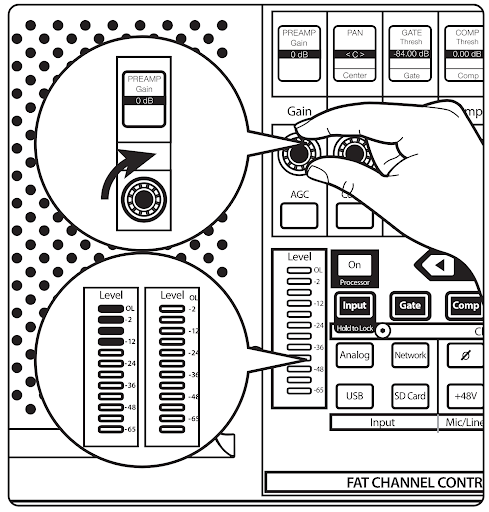
- Adjust Gain until the meter hits green/yellow (avoid red). ~35–40 dB is good for vocals (SM58).
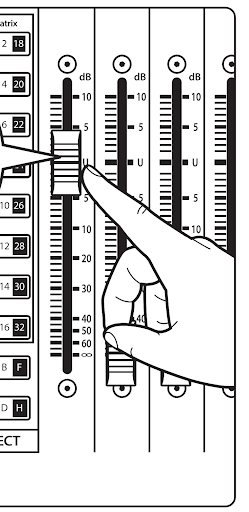
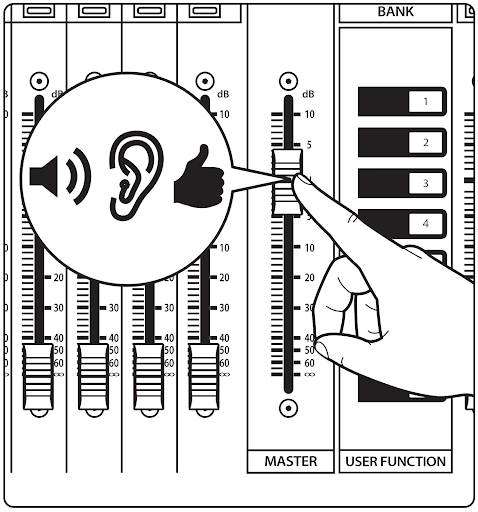
- Raise the channel fader.
- Raise the main fader to set overall volume.
USING THE MONITORS
Monitors are on the rear shelves beside the console. Power cables & adapters are in a small white box labeled “Monitors”.
- Connect ¼″ TRS or ¼″→XLR from Aux 13–16 (snake behind curtain) to the monitor speaker.
- Plug into input 1 or 2 in the back of the monitor.
- Turn the monitor on & adjust trim knob for volume.
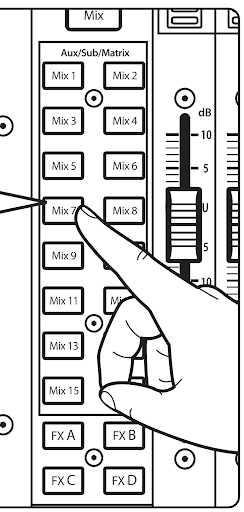
- On the console, press Mix 13-16 (Choose the Aux your monitor is plugged into), then use the faders to send signal.
POWERING DOWN
- Power off all monitors.
- Turn off
+48vphantom power (if used). - (Optional) Recall Project/Scene “Zero” to reset console.
- Return all cables, mics, and gear to original storage.
- Turn off the console.
TECH INFO
Microphones
- Apex 125 (1)
- Apex 381 (2)
- Apex 565 (1)
- Aston Spirit (1)
- Audio Technica KP Kick/Tom (2)
- Audio Technica KP Snare/Tom (2)
- DI Boxes (4)
- Rode M5 (1)
- Fender P51 (1)
- Shure SM58 (3)
- Shure SM57 (1)
Gear
- Console: Presonus StudioLive 24 Series III
Manual - Main Speakers: Yorkville EF12P (2)
- Monitors: Alto TS210 (3)
- Mic Stands: Tall (9), Mid (1), Short (2)
- Cables: XLR (20), ¼” TS (8)